
Craig Main Floor: Before, During, + After
T H E D E S I G N P R O C E S S
We’ve been eager to take on a Japandi-inspired project—and we finally got the chance! Japandi blends Japanese minimalism with Scandinavian simplicity, a style which is rooted in natural materials like wood and stone, a neutral colour palette, a strong connection to nature, clean lines, and thoughtful functionality.
When A+K came to us, they shared their vision of transforming their main floor into a serene, Japandi-style space. Their focus areas included the kitchen, hallway, stairwell, and powder room—and we couldn’t wait to bring their dream to life.
Their wishlist included:
Create a space that’s calm and functional
Want home to feel cohesive from front entry to kitchen
Want to be able to see through to kitchen from front entry
Mainly entertain outside but would like to be able to entertain inside. Currently difficult to prepare and serve food.
Enjoy cooking together but space is frustrating and awkward
Need more prep space
Need better storage solutions
Appliances feel too large for the space, the base oven restricts access to drawers, and the fridge protrudes
Need better spice storage
Coffee and tea are integral to daily life; want a functional location to store all coffee and tea related items
Create better coat and shoe storage at the back door, A+K’s main entrance
Consider removing walls at back entry to eliminate bottleneck
Replace flooring throughout main floor
Very tight powder room used to be a closet, need to create more space
Increase leg space in powder room
Add wallpaper to stairwell as a transition between Japandi on first floor and moody spaces on second floor
Replace/recreate newel posts
Add storage to hallway and tie into Japandi style
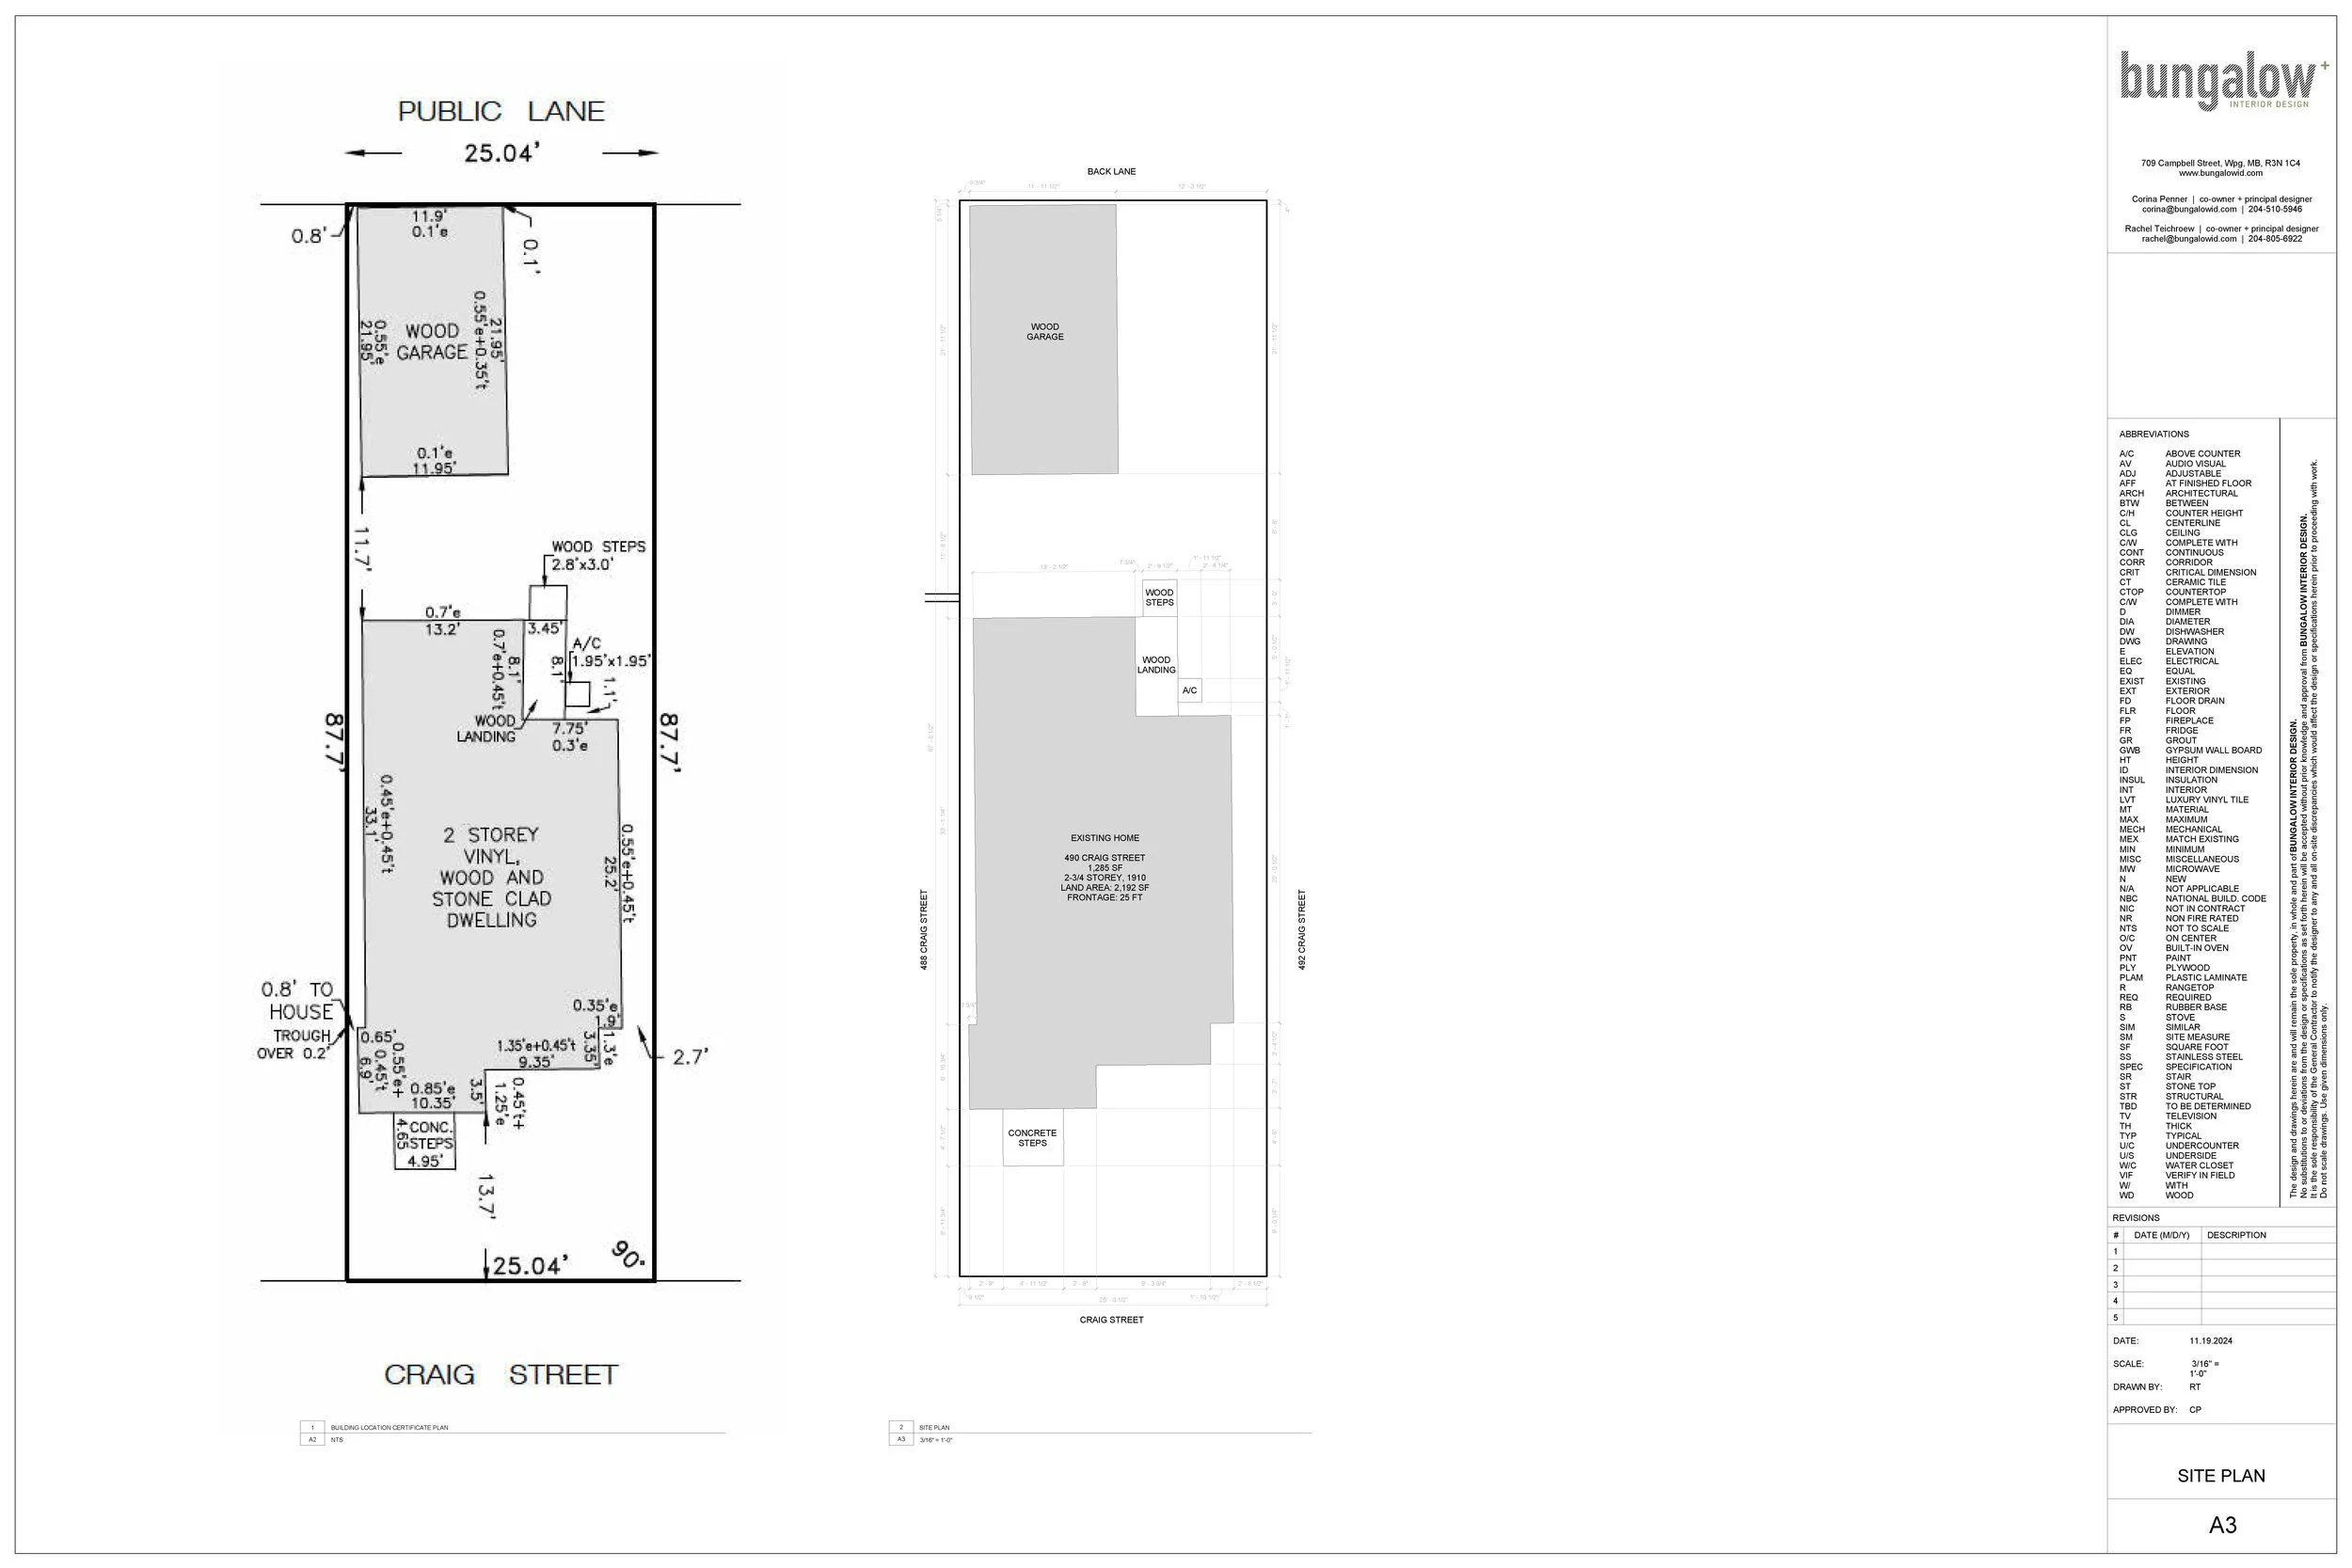
With their wishlist in hand, we began the design process with a thorough site measure in April 2024.
THE SITE MEASURE
Measuring the existing space is a crucial first step in the design process. It allows us to thoroughly understand the layout and identify any constraints that could impact the design. For this project, we were especially meticulous in our documentation, knowing that structural changes might be required.
During the site measure, we also captured a full set of before photos and videos—not only as a reference throughout the design phase, but also to enjoy those always-satisfying before-and-after comparisons once the project is complete.

PREVIOUS FLOOR PLAN
BEFORE


SCHEMATIC DESIGN
The schematic design phase is an exciting one full of brainstorming, trial, and error. As we work through the constraints of the space we typically come up with two or more options to present to the homeowners that show how the space can be better utilized.

OPTION 1
In this option, we explored keeping the existing walls intact to show how the layout could function with minimal structural changes. However, it wasn’t the most efficient use of space and ultimately didn’t meet enough of the homeowners’ priorities.

OPTION 2
In this option, we removed the existing chimney and the walls enclosing the back entry, allowing us to wrap cabinetry along the exterior walls. While this layout opened up the space visually, the homeowners felt it didn’t provide enough counter space, and the corner between the sink and stove felt too tight for comfortable use.

OPTION 3
Sometimes you have to explore an option to realize it’s not the right fit. While this layout included all the essential elements, it lacked sufficient counter space, and the central area wasn’t spacious enough to accommodate an island—leaving the room feeling underutilized.

OPTION 4
This option mirrors Option 2, but features a curved island to encourage more fluid movement through the space. While the softer shape offered improved flow, the homeowners still had concerns about the layout along the exterior walls and the cramped corner between the sink and stove.

OPTION 5
This option improved the overall flow of the space, but presented the opposite issue to Options 2 and 4—it didn’t make full use of the available wall space.

OPTION 6
This option provided the homeowners with the most counter space and storage, while also concealing as many appliances as possible—spot the hidden cooktop in the island!
DESIGN DEVELOPMENT
The homeowners ultimately chose Option 6 and we got started on developing the design further.
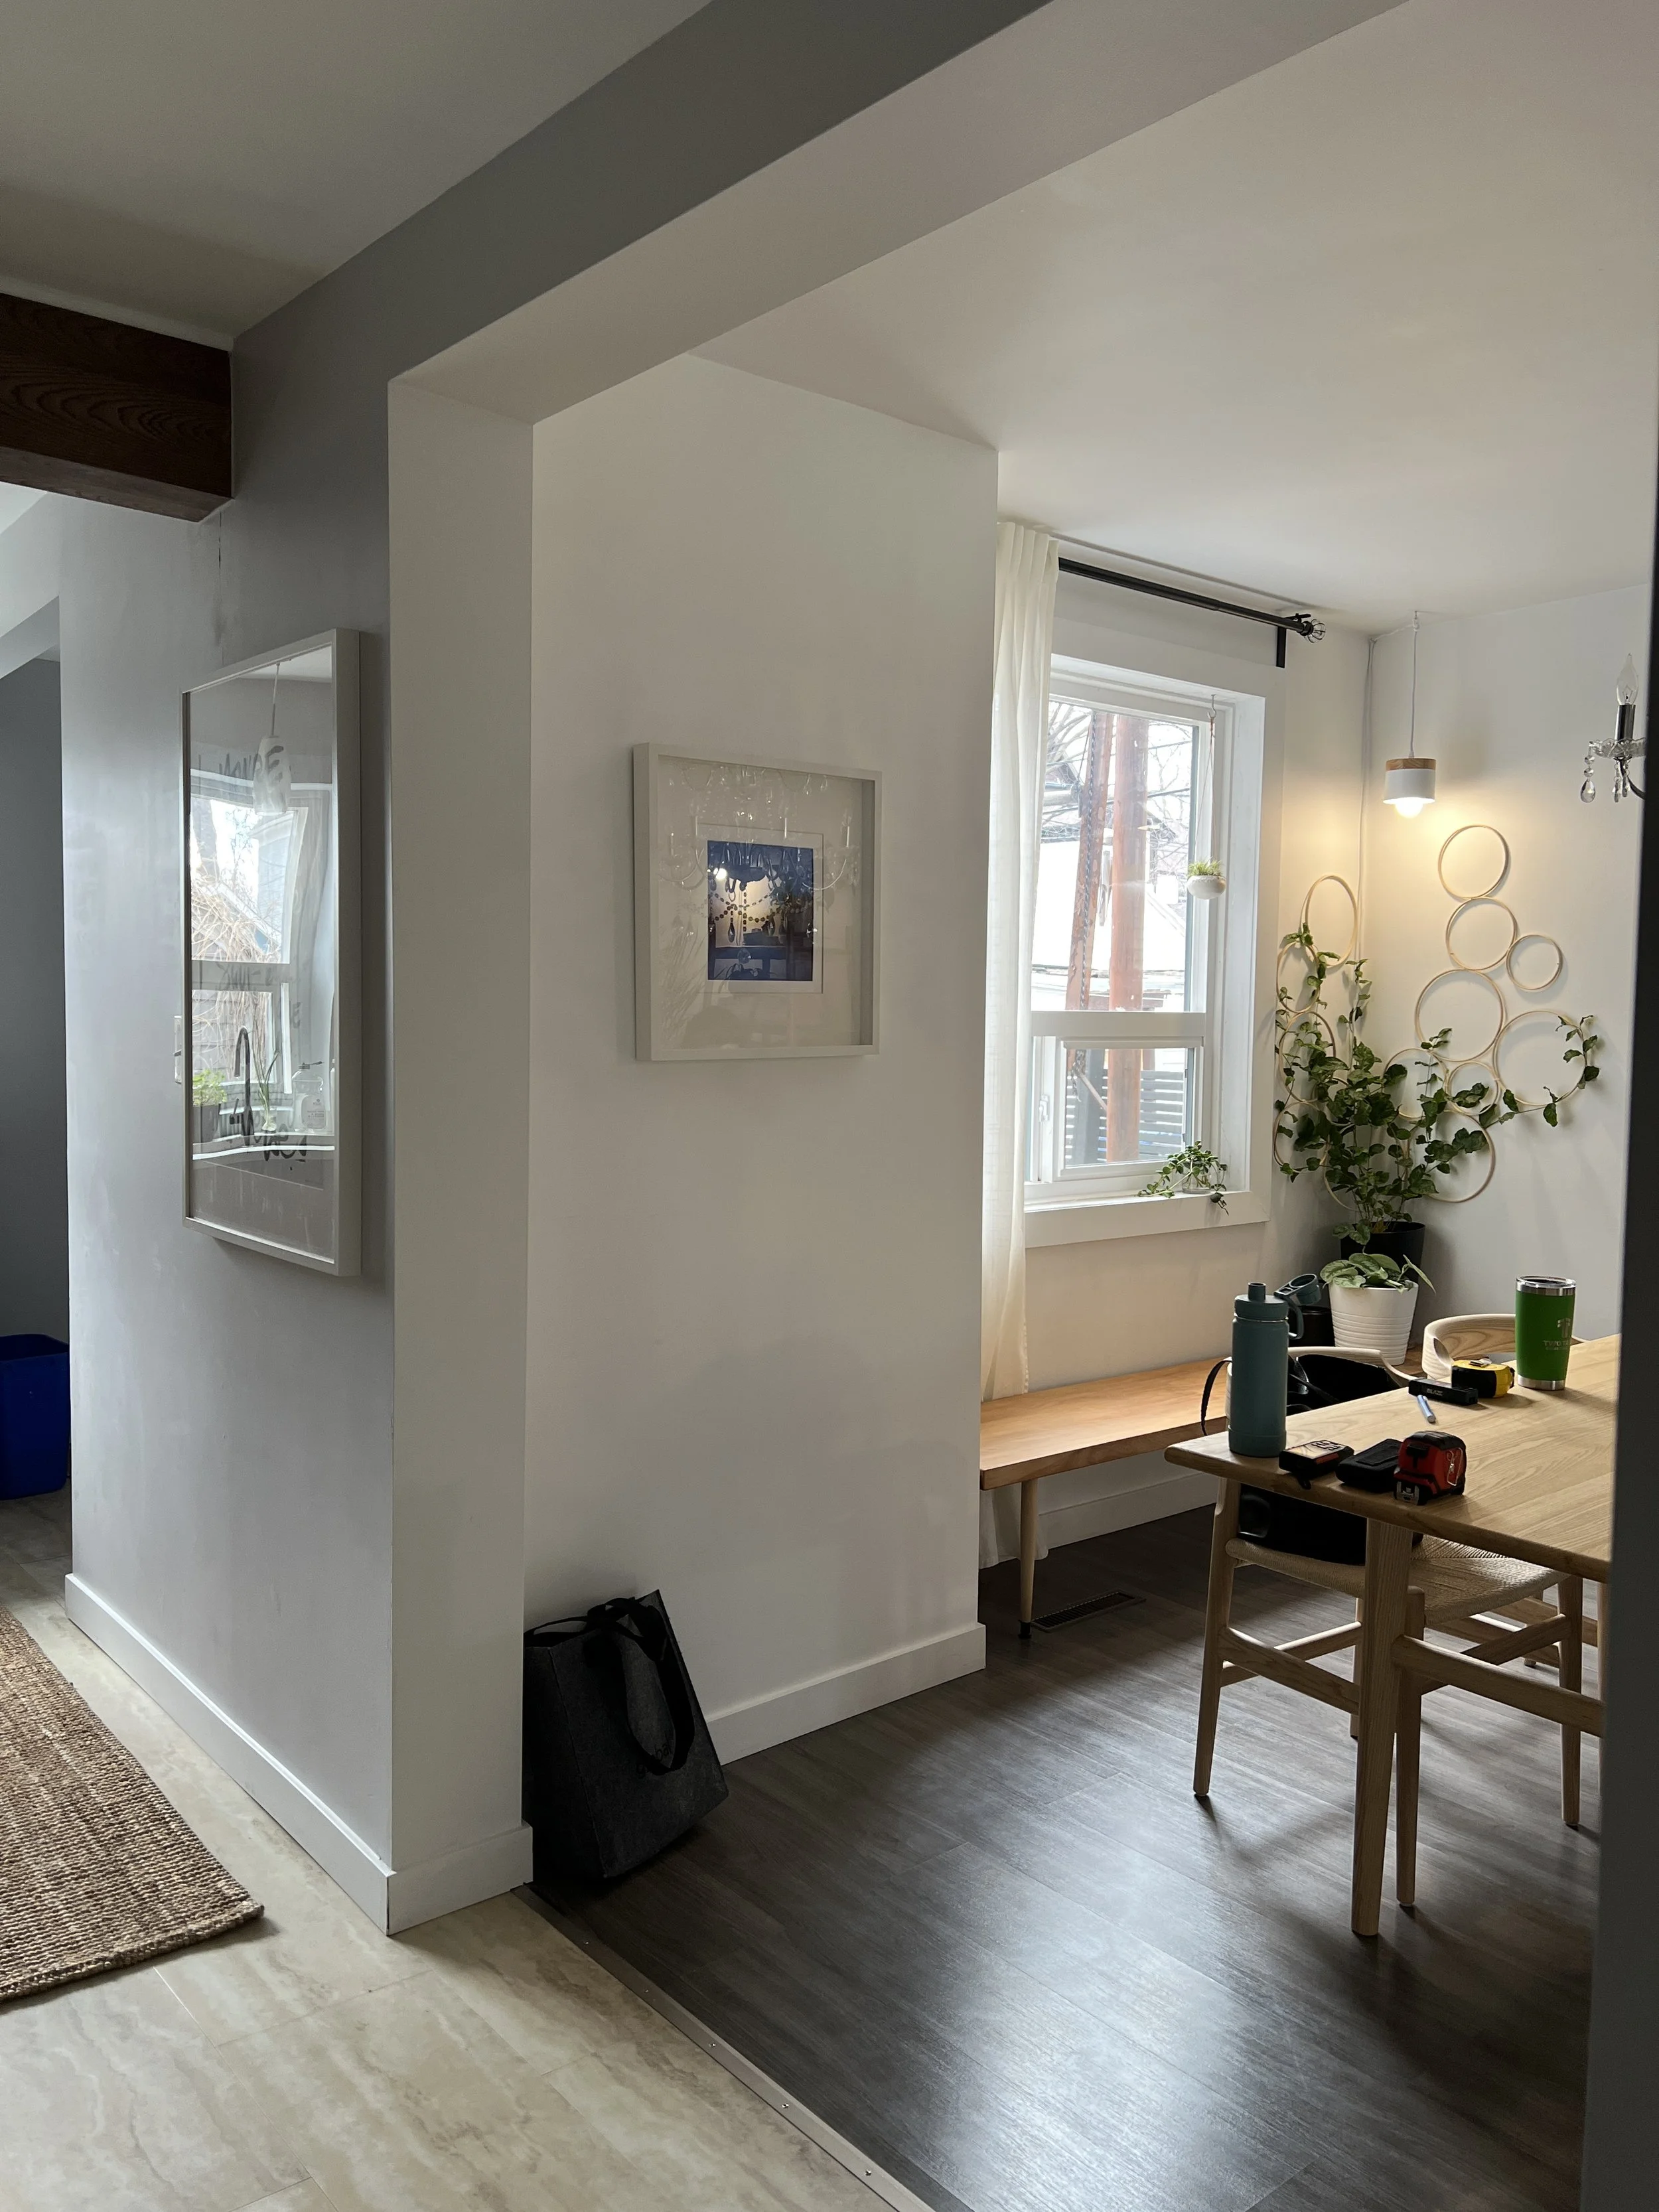
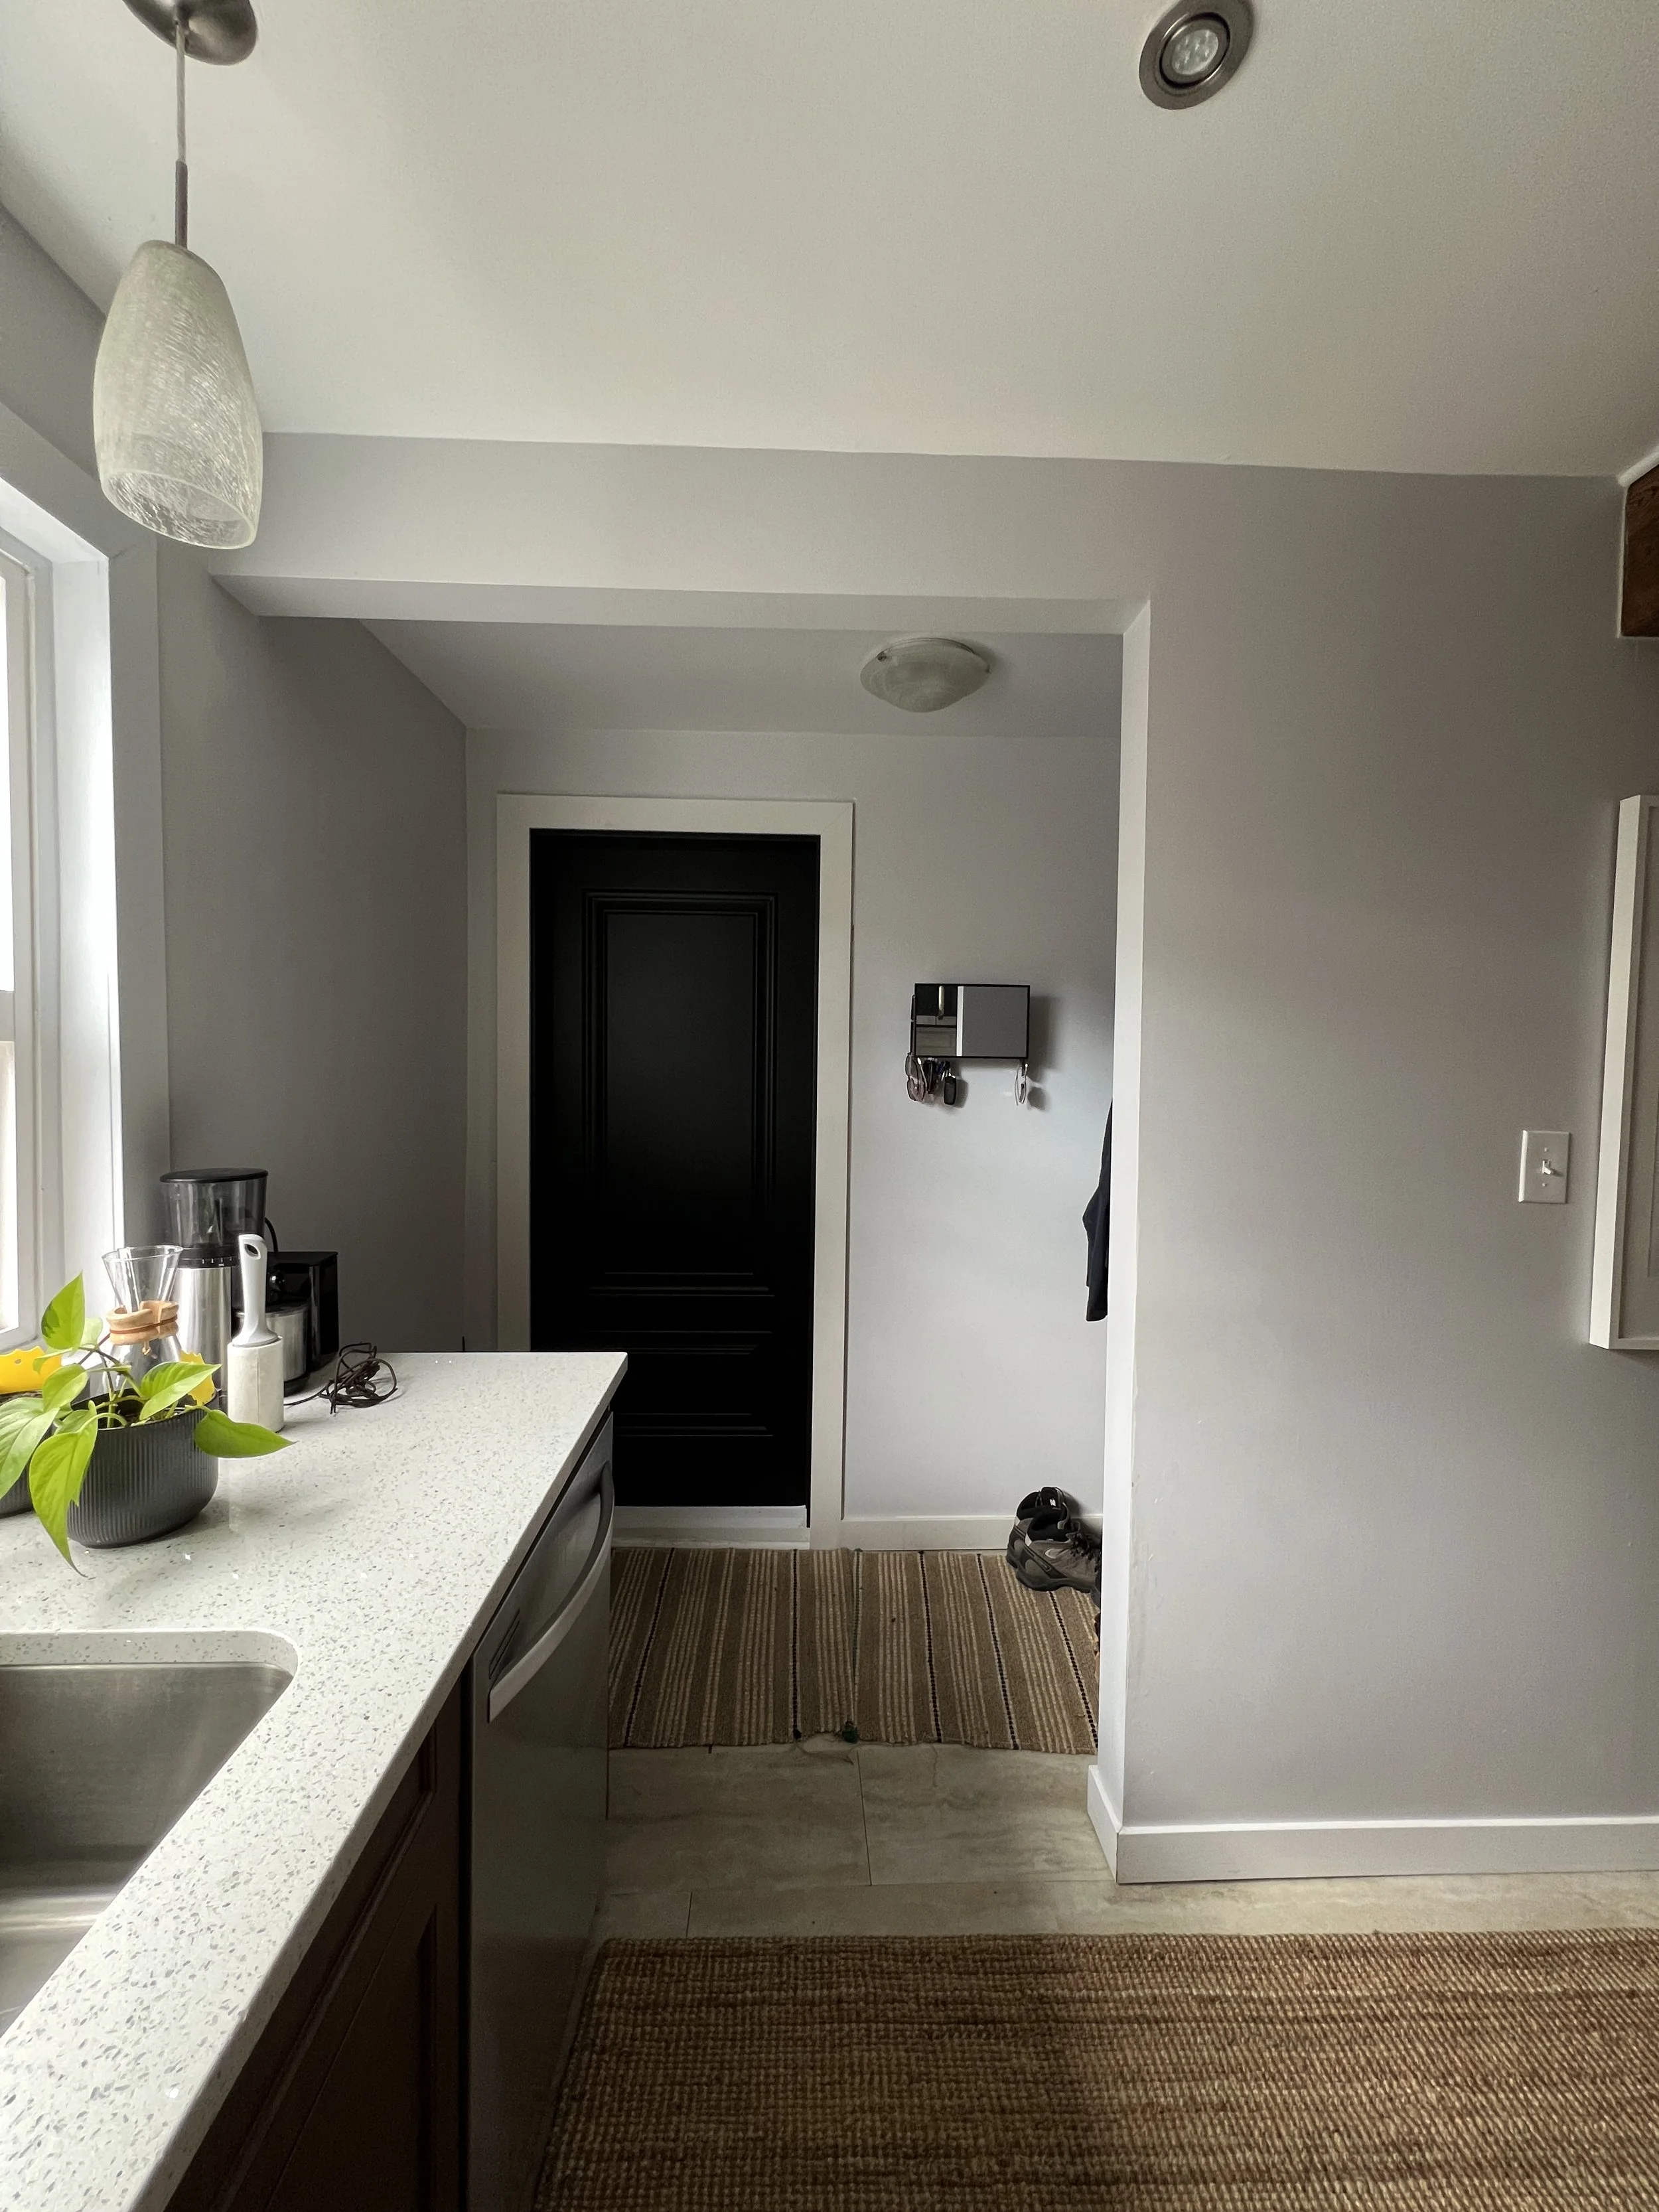
In the kitchen we added tambour panelling to the island to create texture and interest, adding panels to the fridge and dishwasher to make them “disappear”, and hid the cooktop in the island (it’s invisible!). We moved the back door over and developed the tall cabinet beside it into a closet with shoe and hanging storage, and turned the flat end of the island into open adjustable shelving to create a concealed drop zone. Finally, we added a inserts - for pans under the oven, for spices in the island, and for cutlery and small appliances in the corner cabinets.
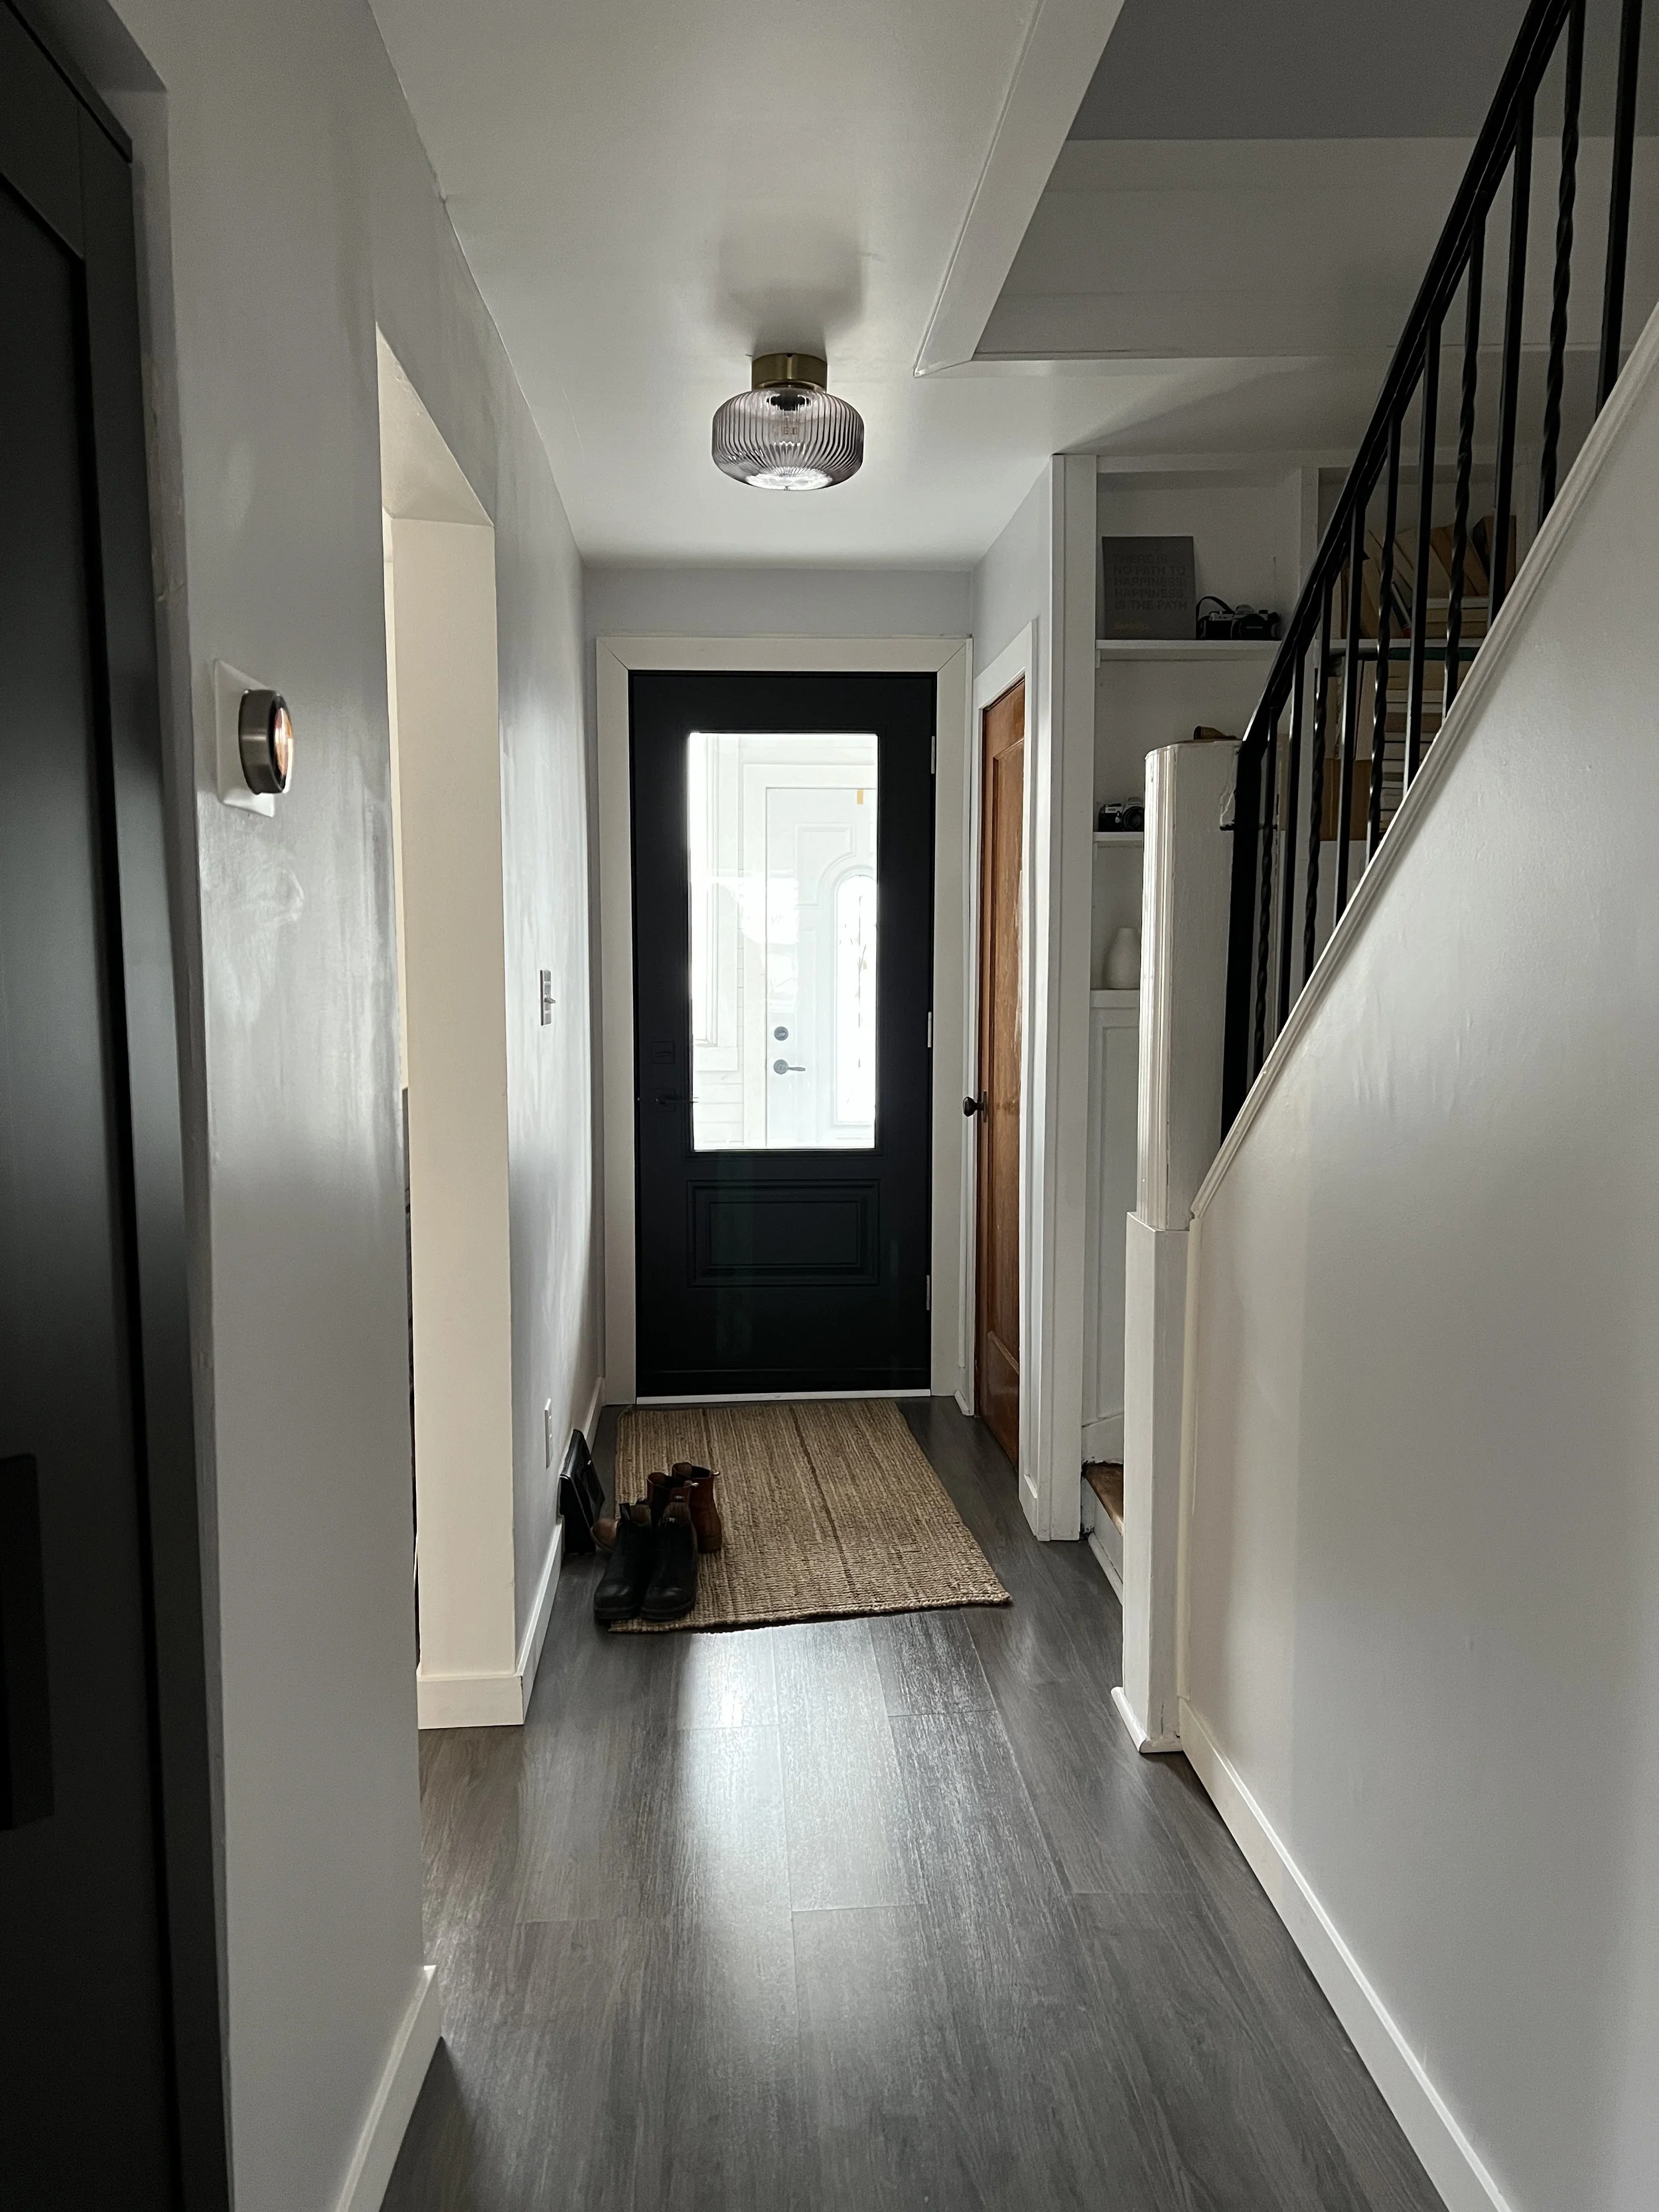
In the hallway and stairwell we added panelling and wrapped the three newel posts in tambour, both to match the kitchen. The hallway alcove was fitted with a flush cabinet for extra closet storage for coats, shoes, and other items. Finally, to tie the main floor and upstairs together we applied wallpaper to the stair wall.
The powder room near the front door was added to the design and construction scope about one-third of the way through construction. The homeowners just decided, “why not?”, since the rest of the main floor was being renovated. Quick decisions had to be made in this space due to the flooring being installed in a matter of days throughout the main floor, but we were still able to create some excellent design decisions. We created a ledge wall to house a tankless toilet, thereby increasing the knee space in this tight former closet, and added a wall-hung sink and faucet. We tiled the ledge wall with the same tile as the kitchen, and capped the wall in the same countertop. Finally, we added a large wall-to-wall frameless mirror above the ledge wall to make the room feel bigger.

MATERIALS
One of the first design elements we selected was the red oak tambour panelling, used on both the island and the newel posts. This detail became our starting point with finishes, guiding the cabinetry and flooring choices to create a monochromatic palette of warm wood tones. To complement the natural texture of the wood, we added contrast with white mosaic tile and black hardware.
The countertop was chosen primarily for its functionality—it needed to accommodate an “invisible” induction cooktop that uses magnetic technology to heat directly through the surface. Because of this, we selected a porcelain material, which can withstand sudden changes in temperature without warping. With this technology, you can be cooking directly on the counter one moment and safely touch it with your bare hand the next.
To finish the palette, we introduced a textured green wallpaper inspired by Japanese design, which adds depth and visual interest to the stairwell while providing a connection between the Japandi-inspired main floor and moody second floor.

TRADE DAY
After finalizing the material selections, we hosted a trade day—a dedicated site visit where we invite our preferred trades to review the preliminary design plans and walk through the space. It’s an opportunity for them to ask questions, assess site conditions, and gather the details needed to prepare accurate construction quotes.
Following trade day, we allowed a few weeks for quotes to come in before compiling and presenting them to the client. In this case, the client loved the design so much that, even though the quotes came in over their initial budget, only minimal revisions were needed to move forward into construction.
FINAL DESIGN


CONSTRUCTION DRAWINGS
Once the pricing was approved, we notified all participating trades, set a tentative construction schedule, and placed orders for materials and furnishings with longer lead times. While preparing for construction, we finalized the design drawings, confirmed all material selections, and added detailed notes to guide implementation.
At the end of the drawing phase, we developed a detailed construction schedule for the trades, ordered the remaining materials, and began setting up the logistics and operations needed to support the build.


PRE-CONSTRUCTION
Our pre-construction document is sent out to all clients at least two weeks before the construction of their project begins. Enclosed is a full breakdown of contact information, a detailed GANTT chart, site expectations so that the homeowners know what we expect of our trades, and finally, what to expect before, during, and after construction and how to prepare.
CONSTRUCTION
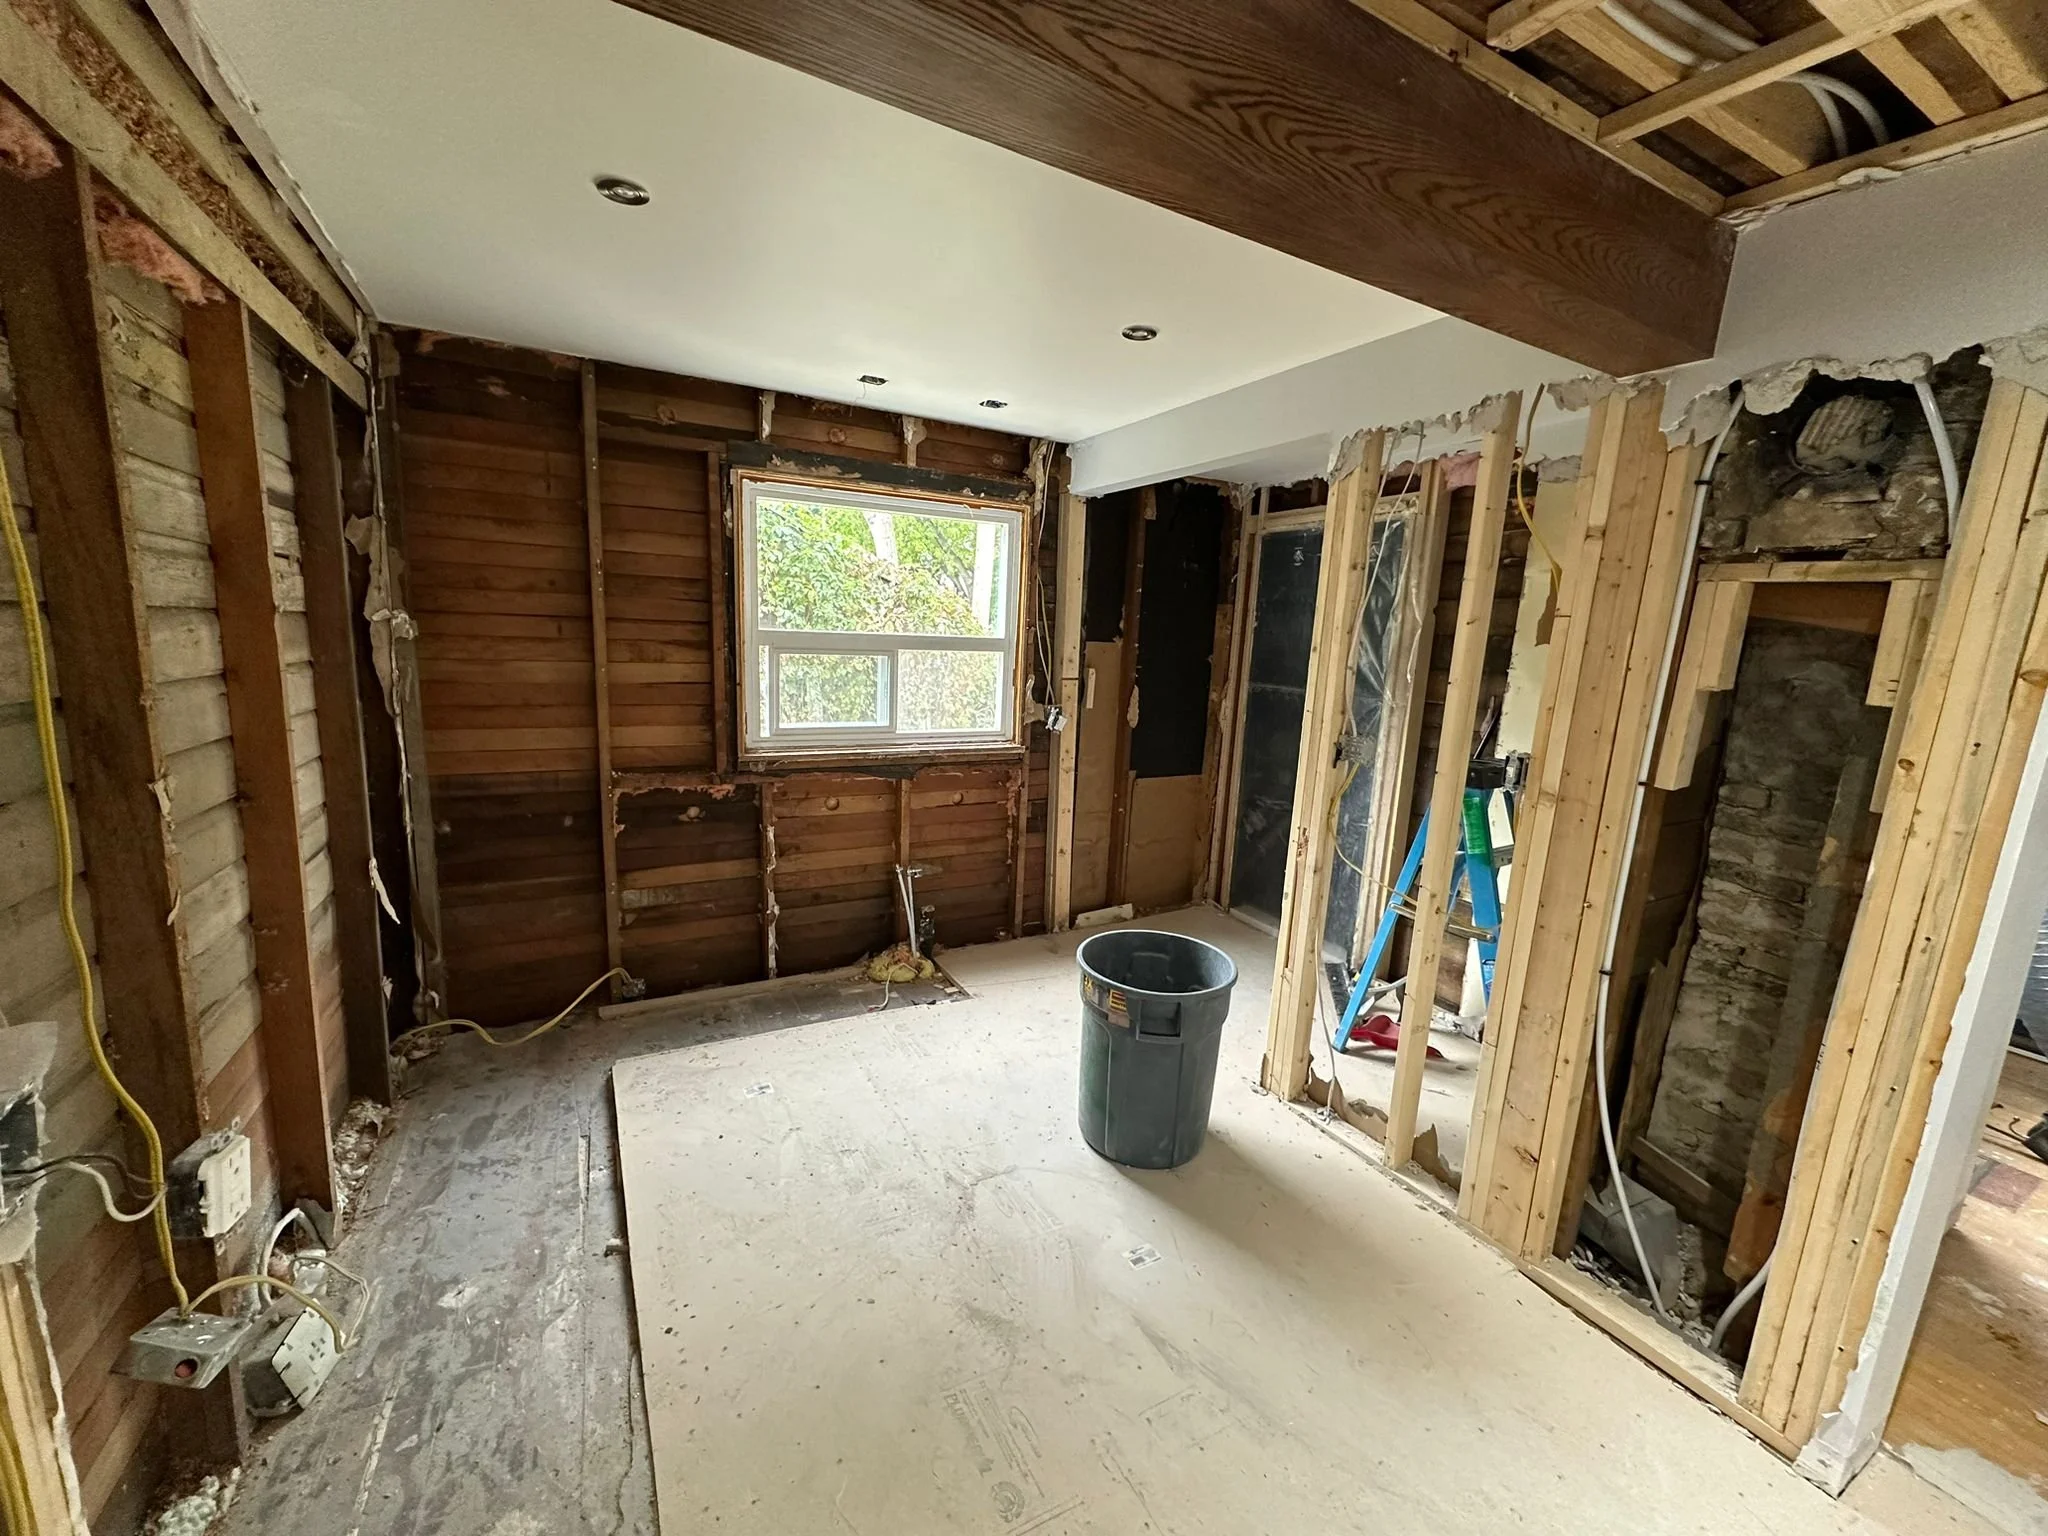
The construction phase of this project was quite a roller coaster! Once we started demolition, we uncovered significant structural issues that weren’t visible beforehand. The homeowners had purchased the home from a house flipper, and unfortunately, much of the previous work had been poorly executed.
Half of the existing kitchen was located in an older addition (pre-dating the flipper), and we discovered it was structurally compromised — a major concern, especially with new cabinetry, countertops, and appliances planned for that space. Even more importantly, both we and the homeowners wanted to ensure that their home was truly safe.
We held multiple meetings with our structural engineer and carpenter to determine the best course of action. Ultimately, we had to completely open up the base of the addition — from both the interior and exterior — to access the foundation piles. What we found was shocking: three layers of floor joists had been added over time instead of properly repairing the issue, and many of them were riddled with rot. Worse still, the structural posts weren’t aligned with the correct piles, causing the entire addition to slowly sink into the backyard.
With guidance from our structural engineer and skilled trades, we raised the addition onto the correct piles, installed a brand-new floor joist system, re-insulated, and brought both the addition and crawl space up to current building code standards.
Whew — a major fix, but absolutely worth it!


It was at this point in the process, about one-third of the way through construction, that the powder room near the front door was added to the design and construction scope. The homeowners just decided, “why not?”, since the rest of the main floor was being renovated. Quick decisions had to be made in this space due to the flooring being installed in a matter of days throughout the main floor, but we were still able to create some excellent design decisions. We created a ledge wall to house a tankless toilet, thereby increasing the knee space in this tight former closet, and added a wall-hung sink and faucet. We tiled the ledge wall with the same tile as the kitchen, and capped the wall in the same countertop. Finally, we added a large wall-to-wall frameless mirror above the ledge wall to make the room feel bigger.


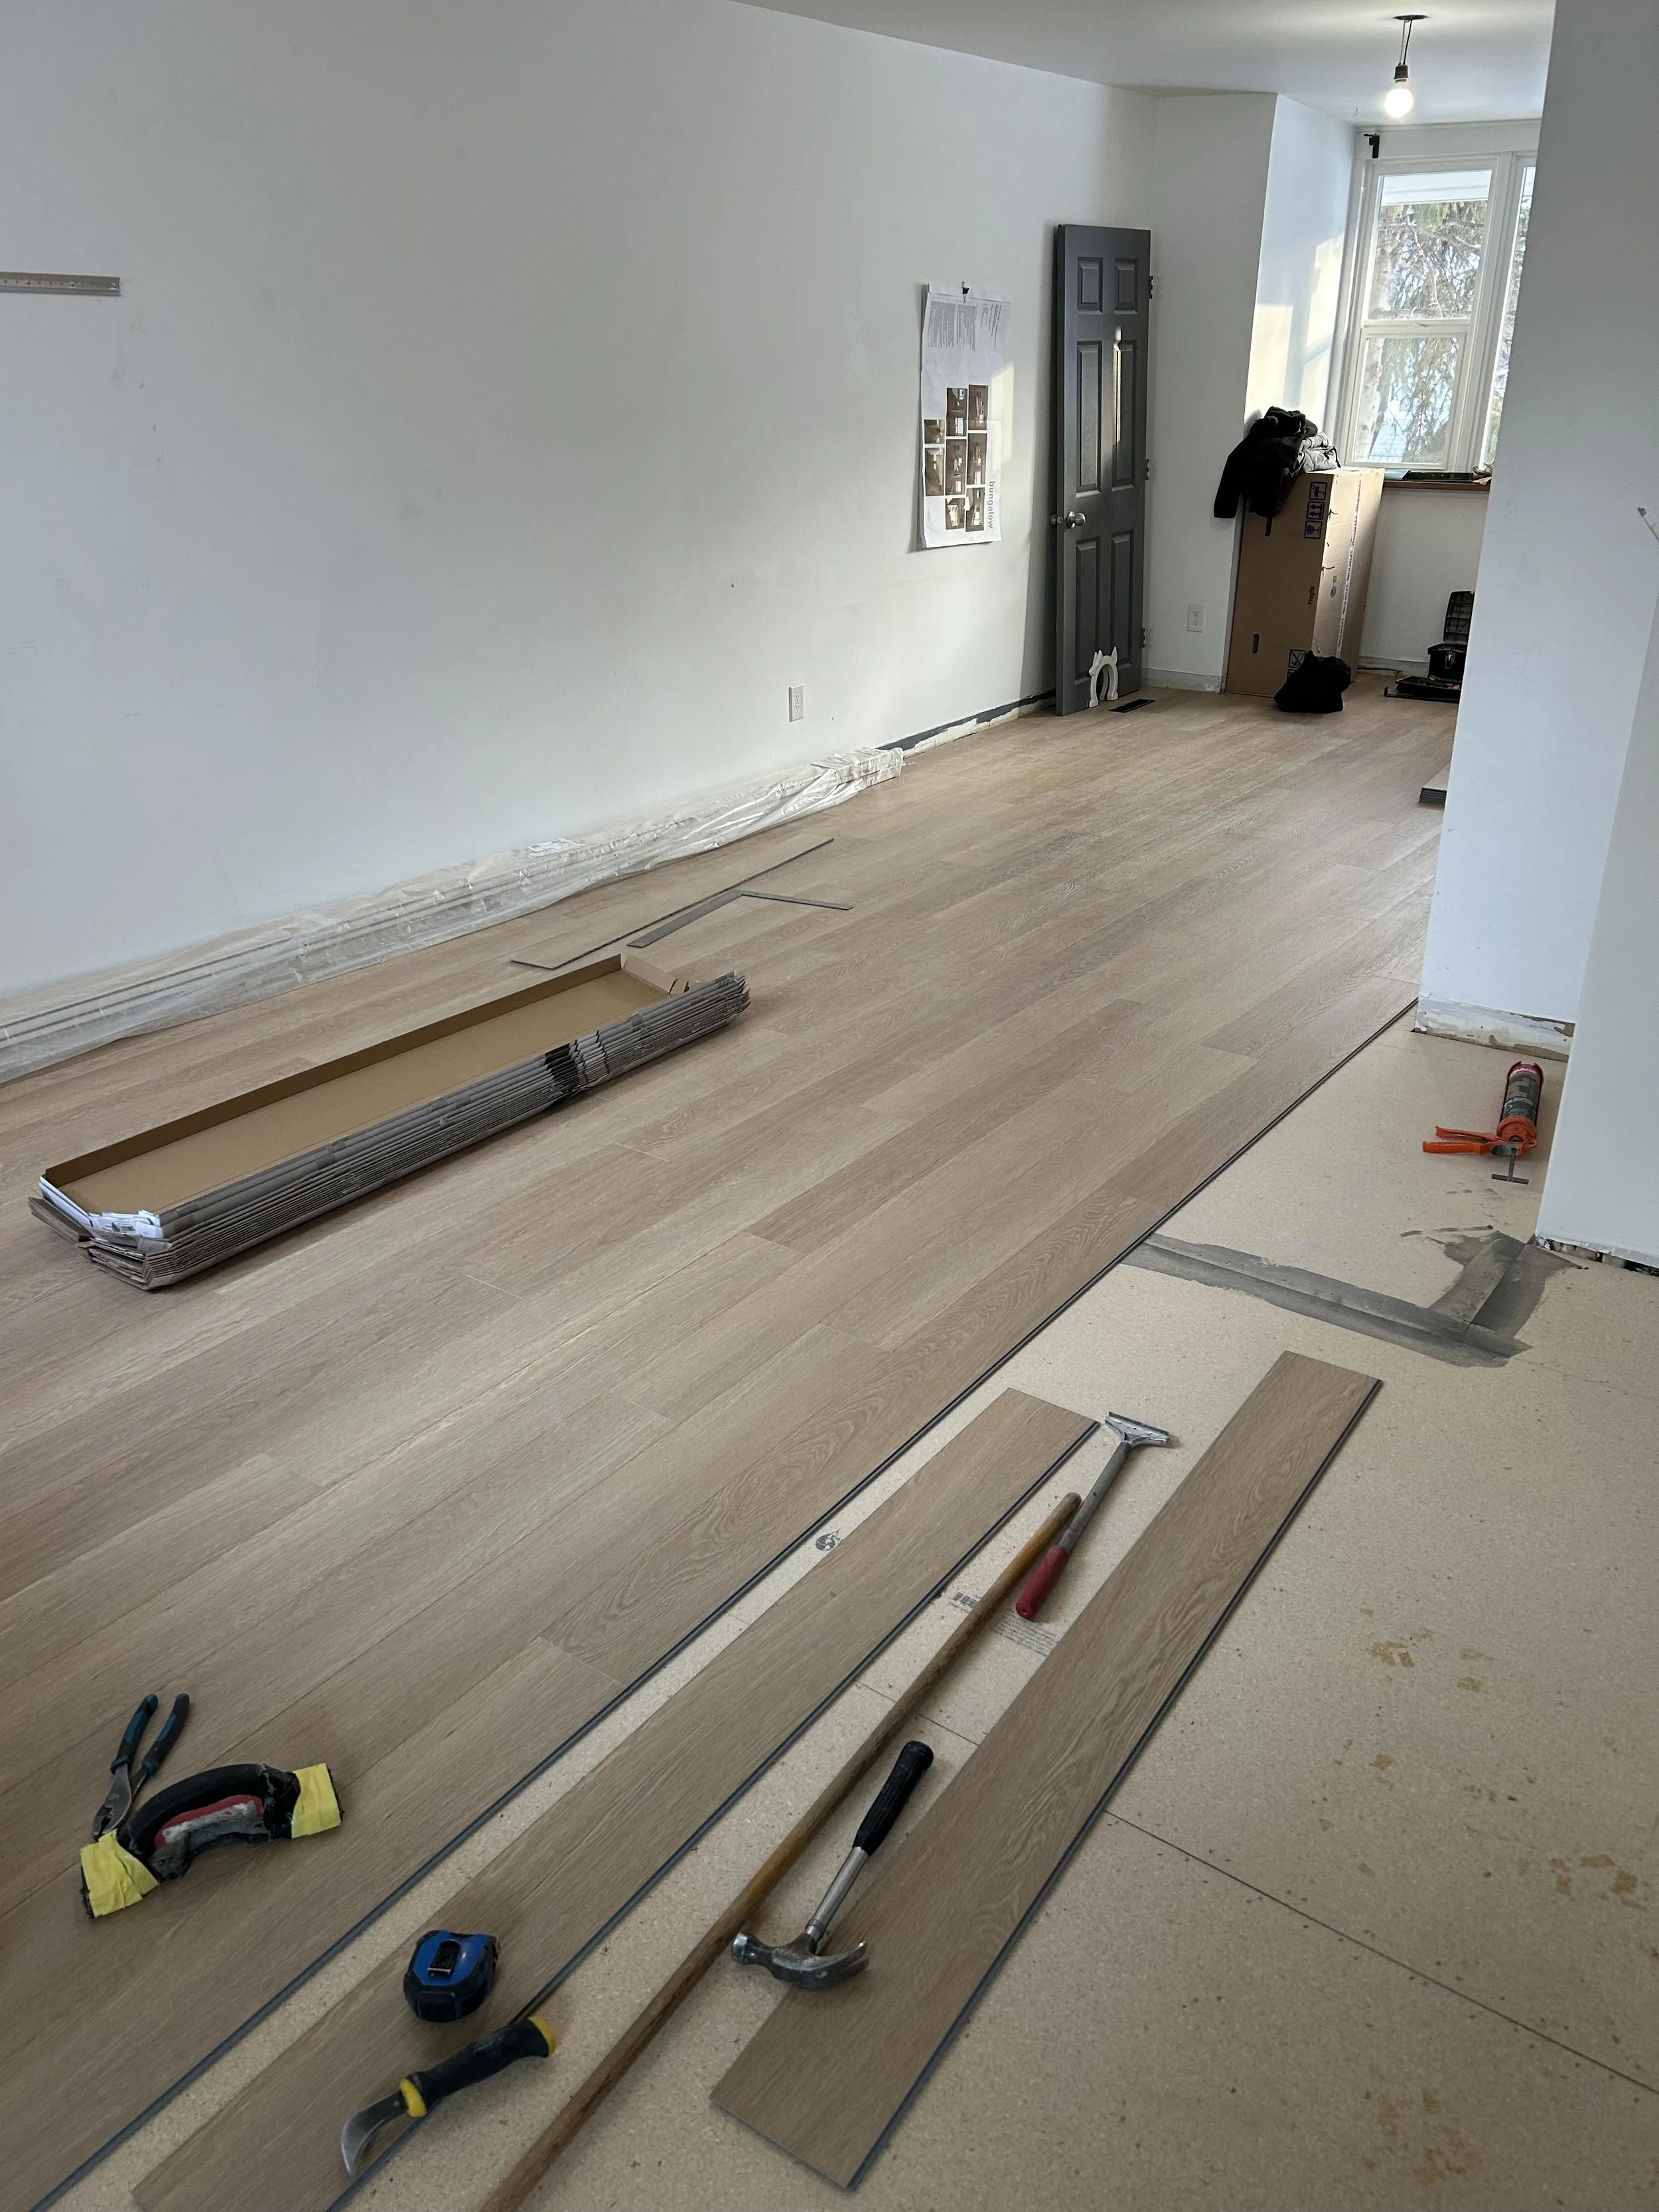
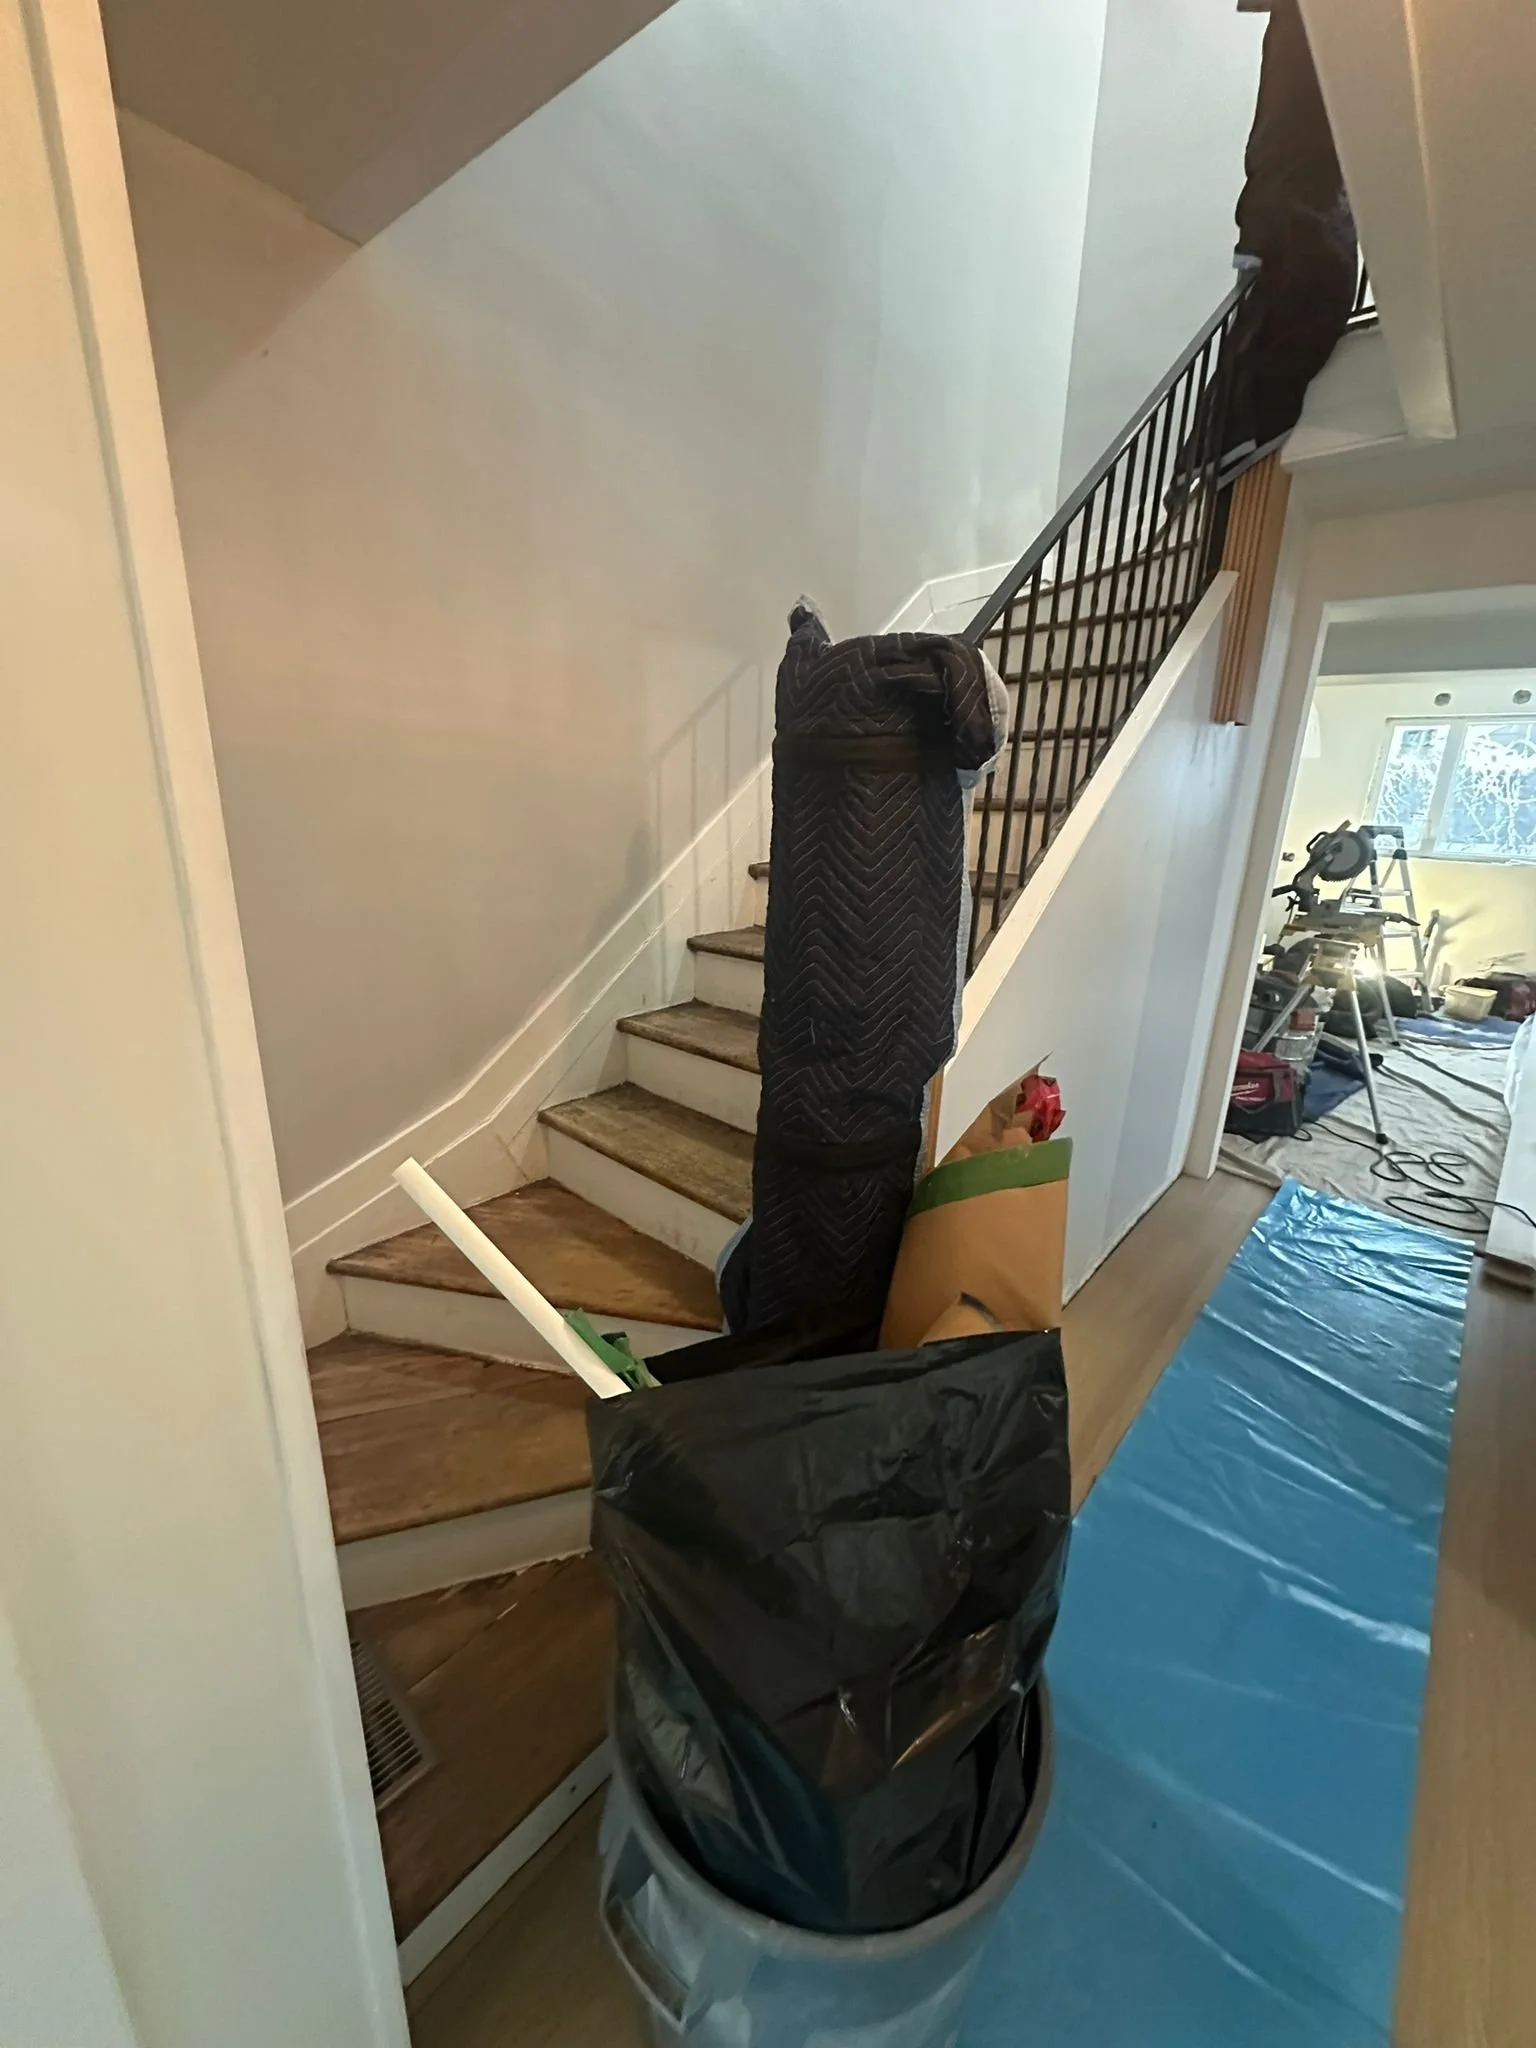
After completing the insulation and vapour barrier, we moved on to drywall, mudding, taping, and flooring — and that’s when the space really started to come together. We installed a beautiful red oak-look luxury vinyl plank (LVP) throughout the main floor, which instantly made the space feel larger and more cohesive.
Next came paint: a warm white on the walls, ceiling, and trim to create a soft, inviting backdrop for the new millwork. Around this time, we also installed the newel posts and stairwell wallpaper — details that added warmth and character, and made everything start to feel closer to being finished.


Then came one of the most exciting phases of the renovation — millwork installation! It’s always a thrilling moment when the first cabinets arrive and the room starts transforming back into a kitchen.
The millworkers began by installing the newel posts and stairwell panelling, setting the tone for the craftsmanship to come. From there, they moved into the kitchen, starting with the perimeter cabinetry before turning their attention to the showstopper: the tambour-wrapped island.
This island included several carefully considered design details. While cabinet doors typically sit above a toe-kick, we wanted the tambour panels to flow seamlessly all the way down, so we specified full-height panels on the non-working side. On the working side, which includes the cooktop, we designed a custom curved tambour toe kick — a feature that’s both functional and visually striking.
We also integrated a flat panel on the cooktop side to house the cooktop controls and electrical outlets. On the open-shelf end of the island, we included additional outlets for convenient device charging — a small but impactful touch that makes everyday living just a little easier.


Sometimes, even with careful planning, adjustments to the cabinetry are needed once countertops and appliances are installed. When the wall oven went in, we realized the surrounding cabinets required adjustments to ensure a proper fit. Similarly, during countertop templating, we discovered that a few cabinet depths needed to be modified so that the countertop would align perfectly with the tall cabinets on either end — one beside the fridge and the other beside the dishwasher.
Thankfully, we work with an incredible team of trades who are just as committed to project success as we are. They returned to site as many times as needed to make sure every detail was executed flawlessly — and the end result shows it.


One of the key benefits of having us manage your construction is that issues get resolved quickly and efficiently. During countertop installation, we discovered a crack in the kitchen sink that required a replacement. While this delayed us by about a week — the new sink had to be ground shipped rather than air shipped to prevent further damage — we kept the project moving by starting on the tile work in the meantime.
COMPLETION
Finally, the finishing touches were completed — the bathroom sink and toilet were installed, baseboards and trim went in, lighting was hung, the faucet was connected, and water was turned on. With accessories in place, the space came fully to life. After months of planning and hard work, the project was complete!
This project was truly a labour of love, and both we and the homeowners couldn’t be more thrilled with the result. They’re absolutely loving their new space and are already enjoying all the benefits of a home that’s been thoughtfully renovated to better support their everyday life. Thanks for trusting us with your home A+K!